Pages

Showing posts with label planners. Show all posts

Monday, December 23, 2019

I think this is my most fave that I made using same stamp set from @plannersanon 
Northern Lights kit! 


Sometimes you don't need much stamping
 and coloring to make it look elegant and dreamy! I think I am going to frame it..💕

Thanks for Stopping by!
XOXO Roda

Thursday, April 11, 2019

Hello everyone! I'm back at @thegreetingfarm as Guest Designer Team..
For today's preview, we are featuring Happy Travels set.. 
It is perfect for your upcoming travel/vacations..


Here is a close up look of these cuties.
Colored with Copics.


For more ideas and inspirations hop over at thegreetingfarm blog..

Thanks for stopping by!
XOXO Roda

Tuesday, November 29, 2016

Im inlove!!! I got my mini happy planner

yesterday since its dated, I made an insert

 with 32lb paper. This is for the first

 half week next week..

 Since this is mini planner, instead

stamping the rest of the sentiments

 I wrote some of them instead and made it like a border..

Love Love coloring happy girls it makes me happy

too.. Colored with spectrum Noir in SN papers then

fussy cut them.


#miniplanner#mambihappyplanner #mambi#plannerstamps #planner #kitandclowder#stamps


Hello everyone! Sharing two

Layouts in my happy planner

And webster page planner

Using mommylhey’s stamps.


#mommylheydesigns#happyplanner #mambi #plannerstamps#planner #washi


Hi! Sharing a spread  in

My happy planner using

Polkadoodles digital stamps.


#polkadoodles#digitalstamp #digitalart #mambi#meandmybigideas #planneraddict#planner #plannerstamps


Thursday, March 3, 2016

My HP pen holder & envelope


Hello everyone! sharing another idea that came into my mind
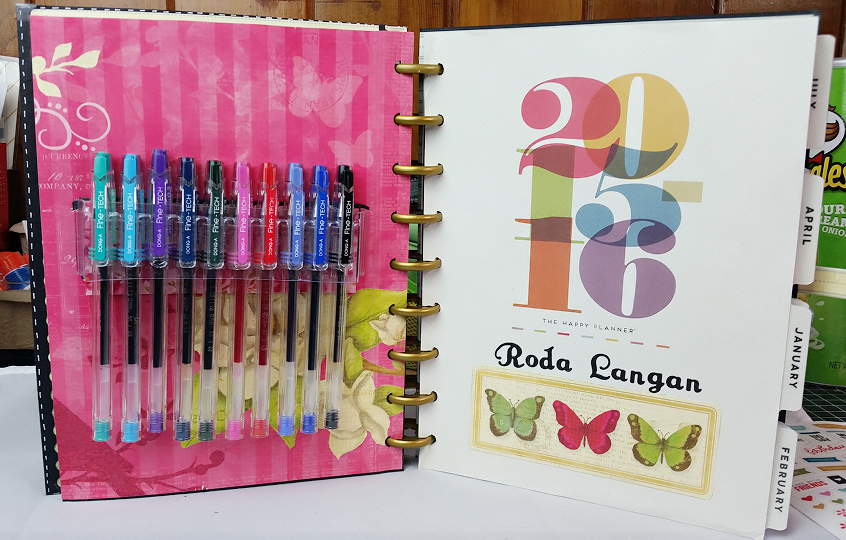
while decorating my planner. I thought, it would be nice if there is a spot where I can put my pens in my planner.
Voila! This is what I came out with. I love how it turned out..


 I made a decorative cut in the cardstock where I can insert my pen holder. 


 this is the front page of my pen holder. I also made an envelope where I can place some of my stickers and clips.


  This is how it looks when its empty. I used clear acetate for the front so that I can easily visualize whats inside.


when my stickers are inside.


 This is what it looks when I close my planner with the pens inside.
It is actually not that bulky.


My New Happy Planner

Hello everyone! Its been awhile since I last posted a project. Today, I want to share my happy planners. Its been so popular in my facebook newsfeed and seeing lots of creative ideas on how to decorate your planning. Its like combination of crafting while doing your planning! I love it… So, I decided to buy my planner and chose me & my Big ideas product. I picked their planners due to 1:) the pages are interchangeable 2:) It has bigger room for journaling and some personalized décoration 3:) It is cheaper (where I bought it from Blitsy at that time they were like 4 usd)


I was planning to use the green planner for my own plans with some accessories (I love decorating). The gold one I’ll leave it as is with our plans/activities for hubby to check if we have some plans. And I got the perfect spot for it (in our kitchen) LOL that’s where hubby stayed most of the time. For the black one which is a kit, maybe I will just put it aside for next year. Good thing it doesn’t have months labelled. I cant wait to get started!